

1999年我在大学的时候听到大学同学一句:美国轰炸我们的领事馆了。愤然中冲上街头..那是我第一次参加游*行,一直到深夜.这次游行没有组织,没有头绪,只有愤怒和目标:美驻华成都使馆.当时真觉得火焰在心头燃烧.
第二日算是我第二次游*行,虽说只一夜之隔,但是差距很大,这次是有组织的,学校?学生会?不得而知,反正最后整个人民南路都是人。心中依然在燃烧,但是似乎变了味,昨天是红色的火焰,今天变了蓝色的了──昨天的火是在草原中的篝火,今天是煤气灶里的火.
2005 年和宝贝在广州参加了我的第三次游*行,反日游行,我们一直步行到广州花园酒店,>但是后面的游行我觉得变了味,游*行吗,一种诉求,应该是为了让日本看到我们的愤怒我>们的团结,但是后面,有人开始砸东西,撕海报。再到后面我都去买了东西回了家,竟然有人走到了太平洋电脑城,说是要除去日货。顿时觉得好笑,这些日货不已经在中国了么,意味着钱都到日本人手里了,还砸什么砸?亏得还不是中国人?不理智加上无理的发泄让我对这次游行无法完全认同(80%还是认同的),只是每每想起当时在天河城上撕Sony广告的哥们,你现在在抵制日货么?这哥们是否觉得这心中的火焰如倒下的煤油灯...星星点点却无法控制,需要是可以助人,不需要时呢?
订阅
2006年8月23日星期三

BlogBus firefox配置
firefox中BlogBus写新日志时不能粘贴的解决方法:
在firefox的配置目录
windows:
linux:/root/.mozilla/firefox/[****.default]/
添加文件user.js
内容为:
user_pref("capability.policy.policynames", "allowclipboard");
user_pref("capability.policy.allowclipboard.sites", "http://www.blogbus.com");
user_pref("capability.policy.allowclipboard.Clipboard.cutcopy", "allAccess");
user_pref("capability.policy.allowclipboard.Clipboard.paste", "allAccess");
IBM RS/6000 AIX操作系统的安装(转)
一、安装基本操作系统(BOS)
打开计算机或在开机状态下重新启动(#reboot)
将AIX安装盘放入光驱
当系统自检 keyboard 通过后,按"5"(从光驱引导)
系统提示:
Please define the system Console
后,按"1"(确认终端)
系统提示:
Type a "1" and press Enter to use this terminal as the system console
后按1(选择英语为安装语言)
进入安装程序,按系统提示操作:
选择“ 2 Chang/show Installation Settings and Install” 其它选项不需改变,只需改以下两项:
将安装方式改为“New and Complete Installation“
选择所要安装系统的disk
开始install。
二、设置终端类型(TTY)
结束安装后,第一次启动时,系统提示选择终端类型,应选择ibm3151
用"root"登录,接着出现系统设置(时间,密码等),直接退出即可
#export TERM=ibm3151(设置终端类型,否则无法进入smit)
#smit tty (设置终端类型,否则以后启动还会要求选择终端类型)
选择 chang/show characeristics of a TTY (修改)
修改 ENABLE LOGIN 为"enable"
修改 TERMINAL type 为ibm3151
三、 安装Bundle
#smit easy_install
选择 INPUT device / directory for software 为[/dev/cd0](按F4选择)
选择 Select a FileSet Bundle 为 Server 及 App-Dev(有图形设备需选Graphics-Startup)
四、 选择安装软件
#smit
进入 Software Installation and Maintenance-〉Install and Update-〉 SoftwareInstall and Updata from LATEST Available Software
选择 INPUT device / directory for software 为[/dev/cd0](按F4选择)
进入 SOFTWARE to install选择所需安装的软件
开头有"@"符即已安装过
开头有"+"符即未安装过
如不装图形终端,则以"X11"开头的不装
以下必须装:
bos.compat (兼容AIX 3)
bos.data
bos.dosutil (dos utility)
有关info,msg的必须装
五、 设置TCP/IP
#lsdev -Cc adapter查看网卡设置(选择IBM 10/100 Mbps Ethernet PCI Adapter)
#smit tcpip
选择"Minimum Configuration & Startup"
在"Available Network Interfaces"对话框中选择 "en0 Standard Ethernet Network Interface"
注意:如有多块网卡,根据前面查看的设置,选择正确的网卡,一般不选"et0 IEEE 802.3 Ethernet Network Interface"
在HOSTNAME中填入所起的主机名(F50-CMIS).
在Internet ADDRESS (dotted decimal)设IP地址(16.54.2.7)
在 Network MASK (dotted decimal)设掩码(255.255.255.0)
在Default GATEWAY Address设网关
在Your CABLE Type选择"TP"
全部选定后按回车(Enter)运行
六、 设置VG(卷组)
#smit vg
选择 Add a Volume Group
设置Volume Grorp Name
设置Physical partition Size in megabytes(PP值,一般2.2G可设4,4.5G可设8,9.1G可设16)
设置Physical Volume Names(选择所需disk)
全部选定后按回车(Enter)运行
七、 设置LV(逻辑卷)
#smit lv
选择Add a Logical Volume
VOLUME GROUP name中选择VG name
Logical volume NAME中填入所起的LV 的名字
Number of LOGICAL PARTITIONS中填入LV大小(这里的数量为Logical Partition数量,一块LP缺省值等于一块PP)
全部选定后按回车(Enter)运行
八、 设置File Systems
#smit
进入 System Storage Management (Physical & Logical Storage)->File Systems->Add/Chang/Show/Delete File Systems->Journaled File System->Add Journaled File System
修改本文件系统块数(Size of File System),一块为512 Bytes
修改Mount Point(为文件系统指定PATHS,如[/oracle])
决定是否在系统启动时自动Mount该文件系统
全部选定后按回车(Enter)运行
九、 安装C及C++语言
查看C安装手册中安装C语言所必须先安装的软件(Software Must be Installed)
#lslpp -l|grep bos.adt.include
#lslpp -l|grep bos.adt.lib
用上述两条命令查看这些文件是否Comitted
#smit install_latest
将C/C++语言安装盘放入光驱
进入 INPUT device / directory for software 选择"/dev/cd0 (SCSI Multimedia CD-ROM Drive)",SOFTWARE to install按"F4",系统显示选择安装文件
选择以xlc开头的所有文件
全部选定后按回车(Enter)运行
十、 连接7133磁盘阵列中的磁盘
将7133中磁盘连上(具体连接方法可查看7133/Model600随机资料)
注意:7133 SSA接口的磁盘为回路连接,从主机后SSA ADAPTER连出后从另一根线连进,此回路中所串联的硬盘即该主机所使用硬盘
#cfgmgr (激活系统,配置磁盘)
注意:在关机状态下连接后再开系统自动调用cfgmgr
十一、 系统磁盘热插拔
必须将所需拔出的磁盘中所在VG中的LV(Logical Volume)与File System进行umount
#lsvg -l datavg (查看datavg中的详细信息).
#df -k (查看文件系统的信息)
#umount /cmis (umount 文件系统cmis)
#varyoffvg datavg (切断datavg)
#lsvg -o (查看当前激活的VG)
#exportvg datavg.(输出datavg)
此时可以拿出该磁盘(该磁盘可以为内置式).
将该磁盘放入另外一台主机
#importvg -y datavg hdisk1(在另外一台主机上键入该命令).
十二、备份策略
rootvg可采用#smit mksysb 来备份
datavg 中的文件系统可进入smit->System Storage Management (Physical & Logical Storage)->File Systems->Backup a File System,选定预备份的文件系统,回车确认即可
datavg可采用smit命令
smit vg->Back Up a Volume Group,选定预备份的vg,回车确认即可
Domino 6 AIX环境下安装
第一部分 系统要求(安装前准备工作)
1. AIX 4.3.3 要求:
ü AIX 必需是 4.3.3_09以上 (使用oslevel检查)
ü 要安装中文环境 ( Lang=zh_CN )
2. AIX 4.3.3. Pacth List:
AIX 4.3.3 - Maintenance Level 9
xlC.aix43.rte 5.0.0.6 C C Set ++ Runtime for AIX 4.3
bos.iocp.rte 4.3.3.76 A I/O Completion Ports API
4.3 APAR for this fix is IY23157. This will bring bos.iocp.rte to a level of 4.3.3.76.
AIX 5.1
xlC.aix50.rte 5.0.2.0 COMMITTED C Set ++ Runtime for AIX 5.0
bos.iocp.rte 5.1.0.11 COMMITTED I/O Completion Ports API
5.1 APAR is IY22656. This will bring bos.iocp.rte to a level of 5.1.0.11.
In addition, the following AIX patch levels are required:
IY21149 - AIX kernel patch
3. AIX I/O completion ports 设置
To verify if a fileset installed and patch level, from the unix command line type: lslpp -l ;, e.g. lslpp -l bos.iocp.rte.
To verify if an APAR is installed, from the unix command line/prompt type: instfix -ivk ;, e.g. instfix -ivk IY23157
**Install fileset bos.iocp.rte via SMIT (System Management Interface Tool), from command line type: smitty installp
select: Install and Update from LATEST available Software >;>; input device / directory for software (input location of fileset)
**Install APAR, from unix command line type: smitty installp, select: Update Software by Fix (APAR) >;>; input device / directory for software (input location of APAR)
**Configure I/O Completion Ports, from unix command line type:
smitty iocp, select >;>; Configure Defined I/O Completion Ports
NOTE: user must be logged in as root in order to install fileset, APARs and to configure I/O completion ports.
4. 创建Notes用户和Notes组
第二部分 Domino 6 安装步骤
系统准备工作完成以后,就可以开始Domino R6服务器安装。
1. 以root用户身份登录。
2. 转到安装目录或CDROM的目录并执行安装程序,
命令为: ./INSTALL
3. 出现欢迎界面,按“tab”键到下一屏。
4. 下一屏要求阅读许可协议(License agreement)。按“tab”键到下一屏,直到许可协议的结束。在许可协议结束时询问是否接受许可协议,缺省为“Yes”。如果接受许可协议,按“tab”键到下一屏。
5. “Do you wan to install data directories only? ;” 选择 “No”
6. 选择要安装的Domino服务器类型。选择服务器类型为 “Domino Utilility Server”(通过空格键选择),[缺省为” Domino Messaging Server” ] 然后按“tab”键到下一屏。
7. “Do you want to install all template files for this Domino Server? ;” 选择”Yes”
8. “Do you want to create /opt/lotus soft link for this Domino Server? ;” 选择”Yes”
9. 选择Domino执行程序的目录,缺省为/opt/lotus。与前面环境准备的设置相同,按“tab”键到下一屏。
10. 下一屏询问是否安装多个分区服务器,缺省为“No”,缺省值即可。然后按“tab”键到下一屏。
11. 下一屏询问是否自动生成数据目录,缺省为“Yes”。按“Spacebar”改为“No”,然后按“tab”键到下一屏。
12. 下一屏显示缺省的数据目录。按“Enter”键输入数据目录/app/lotus/notesdata,然后按“Enter”键。按“tab”键到下一屏。
13. 选择用户,缺省为notes。按“tab”键到下一屏。
14. 选择组,缺省为notes。与前面环境准备的设置相同,所以按“tab”键到下一屏。
15. 下一屏显示已经完成安装程序的配置。按“tab”键继续。下一屏显示安装配置和设置。如果一切正常,按“tab”键开始安装。否则,按“Escape”键重新配置。步骤与上面的过程相同。
16. 安装完成后将显示安装成功。
屏幕显示安装成功后,接着安装语言包。
第三部分 安装中文语言包
安装方法一( 图形界面):
1. 命令为: ./AIXDomLP60_GUI
2. 显示:
InstallShield Wizard
正在初始化 InstallShield Wizard …
正在准备 Java™ 虚拟机…
正在运行InstallShield Wizard.
3. 启动图形化界面, 请按提示操作.
4. 完成安装” Lotus Domino Language Pack Installer”
提示: “The Lotus Domino Language Pack has successfully installed the selected Language Pack”
安装方法二( 文本界面):
1. 命令为: ./AIXDomLP60_CONSOLE
2. 显示:
InstallShield Wizard
正在初始化 InstallShield Wizard …
正在准备 Java™ 虚拟机…
正在运行InstallShield Wizard.
3. 启动文本界面, 请按提示操作
4. 完成安装” Lotus Domino Language Pack Installer”
提示: “The Lotus Domino Language Pack has successfully installed the selected Language Pack”
第四部分 配置Domino 6
在AIX系统上, 首先切换到notes用户
命令: su -notes
配置方法一( 图形界面 ):
1. 当前目录为Domino数据目录, 例: /lotus/notesdata
2. 命令: /opt/lotus/bin/http httpsetup 或 /opt/lotus/bin/server
3. 将启动图形界面, 进行配置Domino 6 (详见下方法二中界面 )
[错误信息: Error: please edit your shell’s DISPLAY environement variable to reflect an unlocked terminal that you would like to launch the Domino Setup Program”]
注意: 若出现该提示信息, 请询问AIX工程师.
(提示: export DISPLAY=130.130.22.22:0.0
xhost +
) 见附录2
配置方法二 ( 远程配置 ):
1. 当前目录为Domino数据目录, 例: /lotus/notesdata
2. 命令: /opt/lotus/bin/server –listen
3. 在远程机器上安装Notes Administrator
4. 在Notes目录下, 命令: serversetup –remote
5.
6.
7.
8.
9.
10.
11.
12.
13.
选择”是”.
附录:
1. 如何查AIX Patch:
# instfix -ik IY17945
All filesets for IY17945 were found.
2. Unlocking Unix system displays for running Domino Java Setup
Most Unix systems create new shells with access control turned on by default. This will result in any application that tries to create a window (such as the new Domino Java Setup program) to fail with Xlib errors.
In order to unlock the system display, make sure that you are logged in as the user that will be running the application, and then type the command:
xhost +
This will disable the systems access control and make it possible to launch the Domino Java Setup program.
Below is an example of the error messages generated when attempting to launch Domino Setup without disabling access control first:
Xlib: connection to ":0.0" refused by server
Xlib: Client is not authorized to connect to Server
Exception in thread "main" java.lang.InternalError: Can't connect to X11 window server using ':0.0' as the value of the DISPLAY variable.
Also, if you will need to make sure that your shell's DISPLAY environment variable points to the x-windows session that you are running on. For example, if you have connected to another system via telnet, you will need to change the DISPLAY variable to point to the system that you are working on. Remember to include the port number of the system display (ie: systemname:0.0).
可能遇到的问题:
磁盘空间不够
解决方法:
smit jfs
Change / Show characteristics of a Journaled File System
mount cd-rom
smit storage
file Systems
Add /Change /Show / Delete File Systems
CDROM File Systems
iocp install
smitty installp
Install Software
/dev/cd0(press F4 key)
SOFTWARE TO INSTALL (PRESS F4 KEY) and select bos.iocp ('/'key to find)
2006年8月9日星期三
mysql操作记要
密码修改:
mysqladmin password xxxxxx
xxxxxx你的新密码。
或者:
1. Stop the mysqld daemon process.
2. Start the mysqld daemon process with the --skip-grant-tables option.
3. Start the mysql client with the -u root option.
4. Execute the UPDATE mysql.user SET Password=PASSWORD('password') WHERE User='root';
5. Execute the FLUSH PRIVILEGES; command.
或者:
直接安装mysql Administrator算了,hehe
版本查看:
mysqladmin version
mysqladmin version --user=root --pass
mysqladmin version -u root -p
2006年8月8日星期二
Redhat AS 4 之 fstab
linux下的中文显示一直比较烦人,每次安装linux都要配置下:修改个显示字体,修改/etc/fstab,免得mount的cdrom or USB disk全不是乱码.刚开始还特有成就感,时间一久就懒的搞。有时候同样的配置硬是不对,不知道这是不是linux的战略意图:让你每次都有不同的感觉!赫赫
Redhat AS4 直接支持utf8 ,这让修改/etc/fstab节省了很多麻烦,因为我老是记不住:iocharset=cp936,codepage=936,shortname=winnt
现在直接一个utf8搞定:
none /dev/pts devpts gid=5,mode=620 0 0
none /dev/shm tmpfs defaults 0 0
/dev/hda1 /mnt/winc vfat defaults,utf8 0 0
/dev/hda5 /mnt/wind vfat defaults,utf8 0 0
none /proc proc defaults 0 0
none /sys sysfs defaults 0 0
/dev/hda7 swap swap defaults 0 0
/dev/sda1 /mnt/USB1 vfat noauto,utf8 0 0
/dev/sda5 /mnt/usb2 ntfs noauto,utf8 0 0
/dev/cdrom /mnt/cdrom auto noauto,utf8 0 0
IBM T20 S3显卡配置
近日在IBM T20上安装Redhat Enterprise AS 4,结果虽然显卡S3 Savage/IX可以认到,但是分辨率却只能到800X600,找了半天,没搞懂到底是Xorg无法认到显卡,还是配置出错,后来发信给Alex Deucher,结果证实其实只是xorg.conf配置有问题:
Section "Monitor"
Identifier "Monitor0"
VendorName "Monitor Vendor"
ModelName "Unknown monitor"
HorizSync 31.5 - 37.9
VertRefresh 50.0 - 70.0
Option "dpms"
EndSection
修改为:
Section "Monitor"
Identifier "Monitor0"
VendorName "Monitor Vendor"
ModelName "LCD Panel 1024x768"
HorizSync 31.5 - 48.5
VertRefresh 40.0 - 70.0
Option "dpms"
EndSection
并且添加:
Section "Device"
Identifier "Videocard0"
Driver "savage"
VendorName "Videocard vendor"
BoardName "S3 Savage/IX"
Option "AGPMode" "2"
Option "MergedFB" "TRUE"
Option "CRT2Position" "RightOf"
Option "MetaModes" "1024x768-1024x768 800x600-1024x768 1024x768-800x600 800x600 640x480"
Option "CRT2HSync" "30-96"
Option "CRT2VRefresh" "50-160"
EndSection
Section "Screen"
Identifier "Screen0"
Device "Videocard0"
Monitor "Monitor0"
DefaultDepth 16
SubSection "Display"
Viewport 0 0
Depth 16
Modes "1024x768" "800x600" "640x480"
EndSubSection
EndSection
Section "Monitor"
Identifier "Monitor0"
VendorName "Monitor Vendor"
ModelName "Unknown monitor"
HorizSync 31.5 - 37.9
VertRefresh 50.0 - 70.0
Option "dpms"
EndSection
修改为:
Section "Monitor"
Identifier "Monitor0"
VendorName "Monitor Vendor"
ModelName "LCD Panel 1024x768"
HorizSync 31.5 - 48.5
VertRefresh 40.0 - 70.0
Option "dpms"
EndSection
并且添加:
Section "Device"
Identifier "Videocard0"
Driver "savage"
VendorName "Videocard vendor"
BoardName "S3 Savage/IX"
Option "AGPMode" "2"
Option "MergedFB" "TRUE"
Option "CRT2Position" "RightOf"
Option "MetaModes" "1024x768-1024x768 800x600-1024x768 1024x768-800x600 800x600 640x480"
Option "CRT2HSync" "30-96"
Option "CRT2VRefresh" "50-160"
EndSection
Section "Screen"
Identifier "Screen0"
Device "Videocard0"
Monitor "Monitor0"
DefaultDepth 16
SubSection "Display"
Viewport 0 0
Depth 16
Modes "1024x768" "800x600" "640x480"
EndSubSection
EndSection
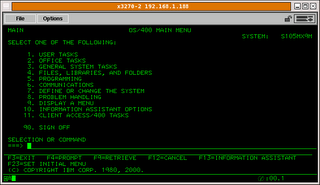
Linux 下的IBM 个人通信
在linux控制os400是很烦躁的事,因为老是有些键无法对应,譬如说F16 F24,等等.
这几天现在发现一个有趣的工具:x3270,可以在linux下方便的操作as400,不过若是直接电缆安装就不行了:(,不过至少还是有个了,免得以后老是telnet.
这几天现在发现一个有趣的工具:x3270,可以在linux下方便的操作as400,不过若是直接电缆安装就不行了:(,不过至少还是有个了,免得以后老是telnet.

订阅:
博文 (Atom)